
Since I stumbled my way into bikepacking three years ago, I’ve been running the same bag setup that I panic-bought weeks before my first overnighter. You know the one; butt rocket, sagging bar bag, and standard issue over-stuffed frame bag. Sure, it was an economical choice. I needed function (what I thought was function at the time, anyway) and I needed carrying capacity because my gear was barely compact enough to get in a car, let alone strapped to a bicycle and hauled uphill for miles.
Fast forward to the present day and my gear is a good deal more compact and lightweight, leading me to rethink how I have my bags set up for trips that have gone from overnight outings to multi-day adventures.

Swift Industries Zeitgeist Handlebar Pack
$124.99
Enter the Swift Zeitgeist bag, a twelve-liter trunk-style bag that can do double duty as a handlebar bag or a seat bag. Did I mention it is also pretty stylish? Because in addition to being highly functional, it also looks a lot more pleasing to the eye than the typical butt rocket or handlebar roll kit.
The Zeitgeist bag has been around for a while now, with early iterations from as far back as 2010. The modern redesign was released in 2020. I’ve had my eye on one since I first came across it back when I started working at TPC in 2021, but I was always of the mind that something so stylish was relegated to being more trendy than useful for the kind of brain-dead bikepacking I like to do. I’m happy to say that line of thinking was off by miles.
The Setup

Out of the box, the Zeitgeist comes with six ¼” foam spacers, two rubber 9” Swift straps, a HDPE plastic liner to hold the bag’s shape, and a bungee cord with a slide-lock. On the back of the bag is a Hypalon sheath housing a fiberglass baton with two attachment points and a vertical slotted Hypalon strip near the underside of the pack for securing to a seat post or head tube. The bag’s lid features two parallel strips of reflective tape, two strips of molle webbing, and four D-rings. The molle webbing and D-rings make it easy to attach things to the outside of the bag in the case that 12 liters of capacity doesn’t quite fit everything.
This is everything you need to mount the bag to the handlebars securely, and if you already run a Brooks saddle or any saddle with integrated saddle loops, the bag is good to go as a saddlebag too. However, if you’re like me and your favorite saddle doesn’t have tabs, an additional purchase of something like the Velo Orange’s saddle loops will be needed to get the bag mounted under your seat.
 Handlebar mounting is straightforward with the supplied spacers, straps, and cord. There are two options for mounting points on the bag's Hypalon sheathed fiberglass strut. The inner attachments are spaced 3.75” apart and the outer attachment points are spaced 9.5” apart. I tried out both before setting off to test the bags on a multi-day bikepacking trip in the Colorado Rockies and found that the inner attachment points had the bag sagging into my front wheel over bumps in the road when loaded with only a six-pack and windbreaker.
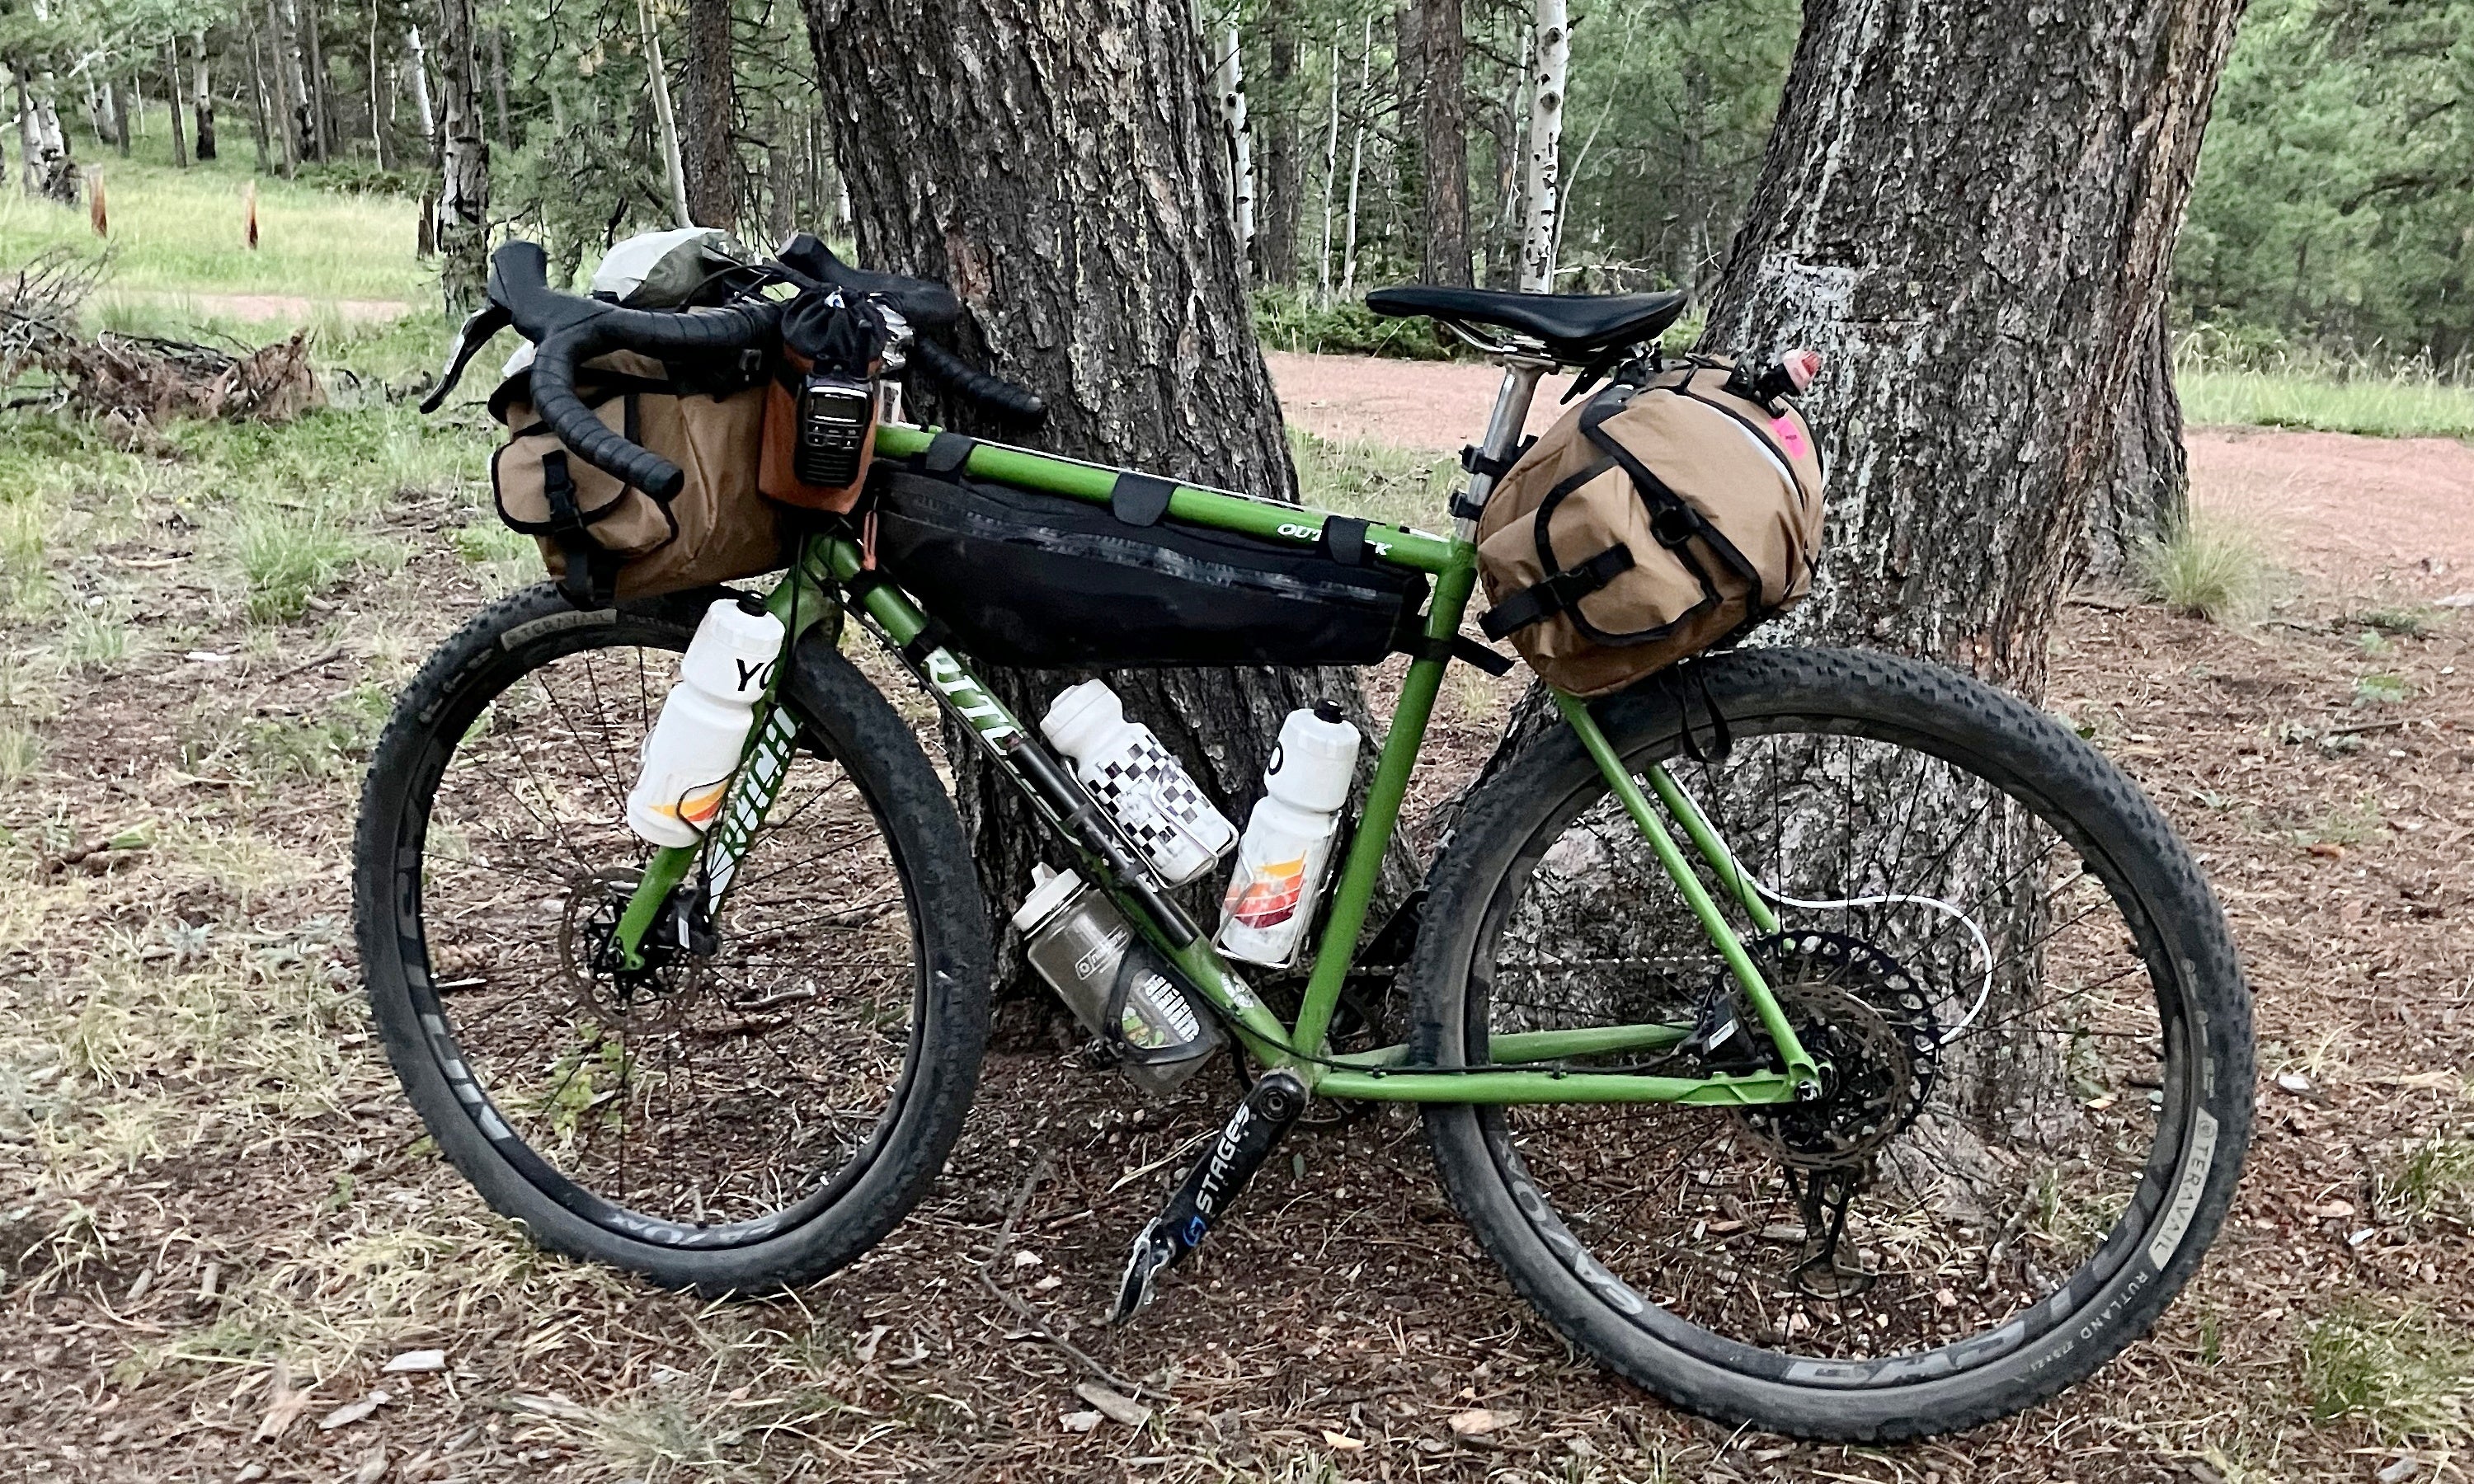
The outer attachment points provided a much more stable and sag-free experience on my 46cm wide drop bars. I used the two Voile style straps and four of the ¼” spacers, two at each mounting point, to set the bag a half inch off the bars and my cables. The remaining two spacers I used at the lashing point on the backside of the pack with the supplied bungee cord threaded through and wrapped around the head tube. Setting up the spacers like this kept the bag from crushing my cables and off of the front tire over all but the harshest hits.

Mounting the bag as a seat bag took a bit more finagling for me. Once the saddle loops were mounted, attaching the bag to them with the provided straps was a minor annoyance. The straps were just long enough to make it a hassle to thread them through the loops. I remedied this by using a set of shorter 6” Voile straps I had from another bag. This made attaching and detaching the bag a breeze.
With the now leftover Swift straps, I cinched the bag to my seat post using all six of the provided ¼” spacers. The angle of the bag allowed me to use two of the lashing points on the backside of the pack, making for a surprisingly secure fit and very little sway when loaded.
Carrying That Weight
With the bags attached as securely as I could get them, I loaded them up with everything I’d need for a five day trip just outside of Colorado Springs, CO.

In the seat bag I loaded up my sleep system (32-degree sleeping bag, inflatable sleeping pad, and an inflatable pillow), spare bibs, puffy jacket, water filter, and camp clothes (thermal top, bottoms, warm socks, and a beanie). This was just in the large main compartment. I hadn’t even used my favorite feature yet, the expandable side pockets!
These came in handy for carrying stuff I would usually try to shove in my already bursting-at-the-seams frame bag. One side pocket carried a small first aid kit and a spare tube while the other pocket managed to hold my camp towel and headlamp. Both pockets likely could have carried a bit more but for this trip I figured I’d save a few items for the pockets on the handlebar bag.

The handlebar pack managed to hold my tent (everything but the poles), my cook kit (plastic bowls, titanium pot, fuel canister, and stove), three dehydrated dinners, three dehydrated breakfasts, two tuna rice bowls, two barbeque pulled pork packets and a few energy bars.
I used the seat bag’s leftover bungee cord threaded through the pack’s molle webbing to hold my rain jacket to the lid. In the side pockets, I carried three rolls of film plus some of my essential medication on one side. On the other side I packed in my emergency flat kit consisting of a Dynaplug Racer, two c02 cartridges, c02 inflator, and spare plugs in addition to my toothbrush, toothpaste and a grip of sanitary wipes. Needless to say, these bags were stuffed.
 Securing the load in both bags was made easy with the draw cord enclosure under the lid and the lateral compression strap. This ensured the contents were sealed up and cinched tight before adding further compression with the lid buckled in place. Once the load was compressed there was almost no movement on the handlebar bag and very minimal sway on the saddlebag.
Yea, but How Do They Ride?
 For the Zeitgeist’s first real test, I took them on a 220-mile gravel route around the Pike’s Peak wilderness that included rocks, ruts, miles of bone-rattling washboard road, and the occasional unexpected drop onto ATV trails. I’m happy to report that not once on the trip did I worry about the bags or notice them enough to complain.
The only very slight negative I experienced while riding was hearing my thighs tapping the seat bag on long climbs. But even then, I didn’t feel it enough for it to really bother me and that mild annoyance was quickly forgotten at the beginning and end of each day when I was packing and unpacking the bags with ease.
One thing I wasn’t able to test thoroughly was the bag’s water resistance, as we had luck on our side and didn’t see a drop of rain for the entire trip. But, for what it’s worth, I did use the bungee cord on the lid to hold my rinsed clothes for the duration of the ride and not once did I have them soak through and get the contents of the bag wet.

While this setup is more expensive (the Zeitgeist retails at $205) than some of the basic bikepacking bags I’ve used in the past, I don’t think I’ll be going back. The ease of loading and unloading the bag is worth the extra dollars and the bags are just as secure if not more so than any pack I’ve strapped to my rig in the past. It doesn’t hurt that they also look especially classy on my bike while holding the majority of my multi-day kit. If you’re in the market for spiffy but functional upgrades to your bikepacking kit or you just want a monster bag to carry things around town, the Zeitgeist will get the job done and then some.