

In between purchasing and cataloging products for the TPC site, I occasionally visit websites like Bikepacking.com or the Radavist to read about epic bikepacking trips, esoteric bikes made of metal, or expensive handmade bags. One thing that always catches my eye are setups that utilize Dynamo Lighting.
While I’ve used inexpensive rechargeable rear lights for years without issue, my front lights always seem to run out of battery sooner than they claim, so the idea of a self-sufficient light powered by my own pedal strokes has always intrigued me. On top of that, I’ve been finding it harder and harder to squeeze mid-week rides in during the day time.

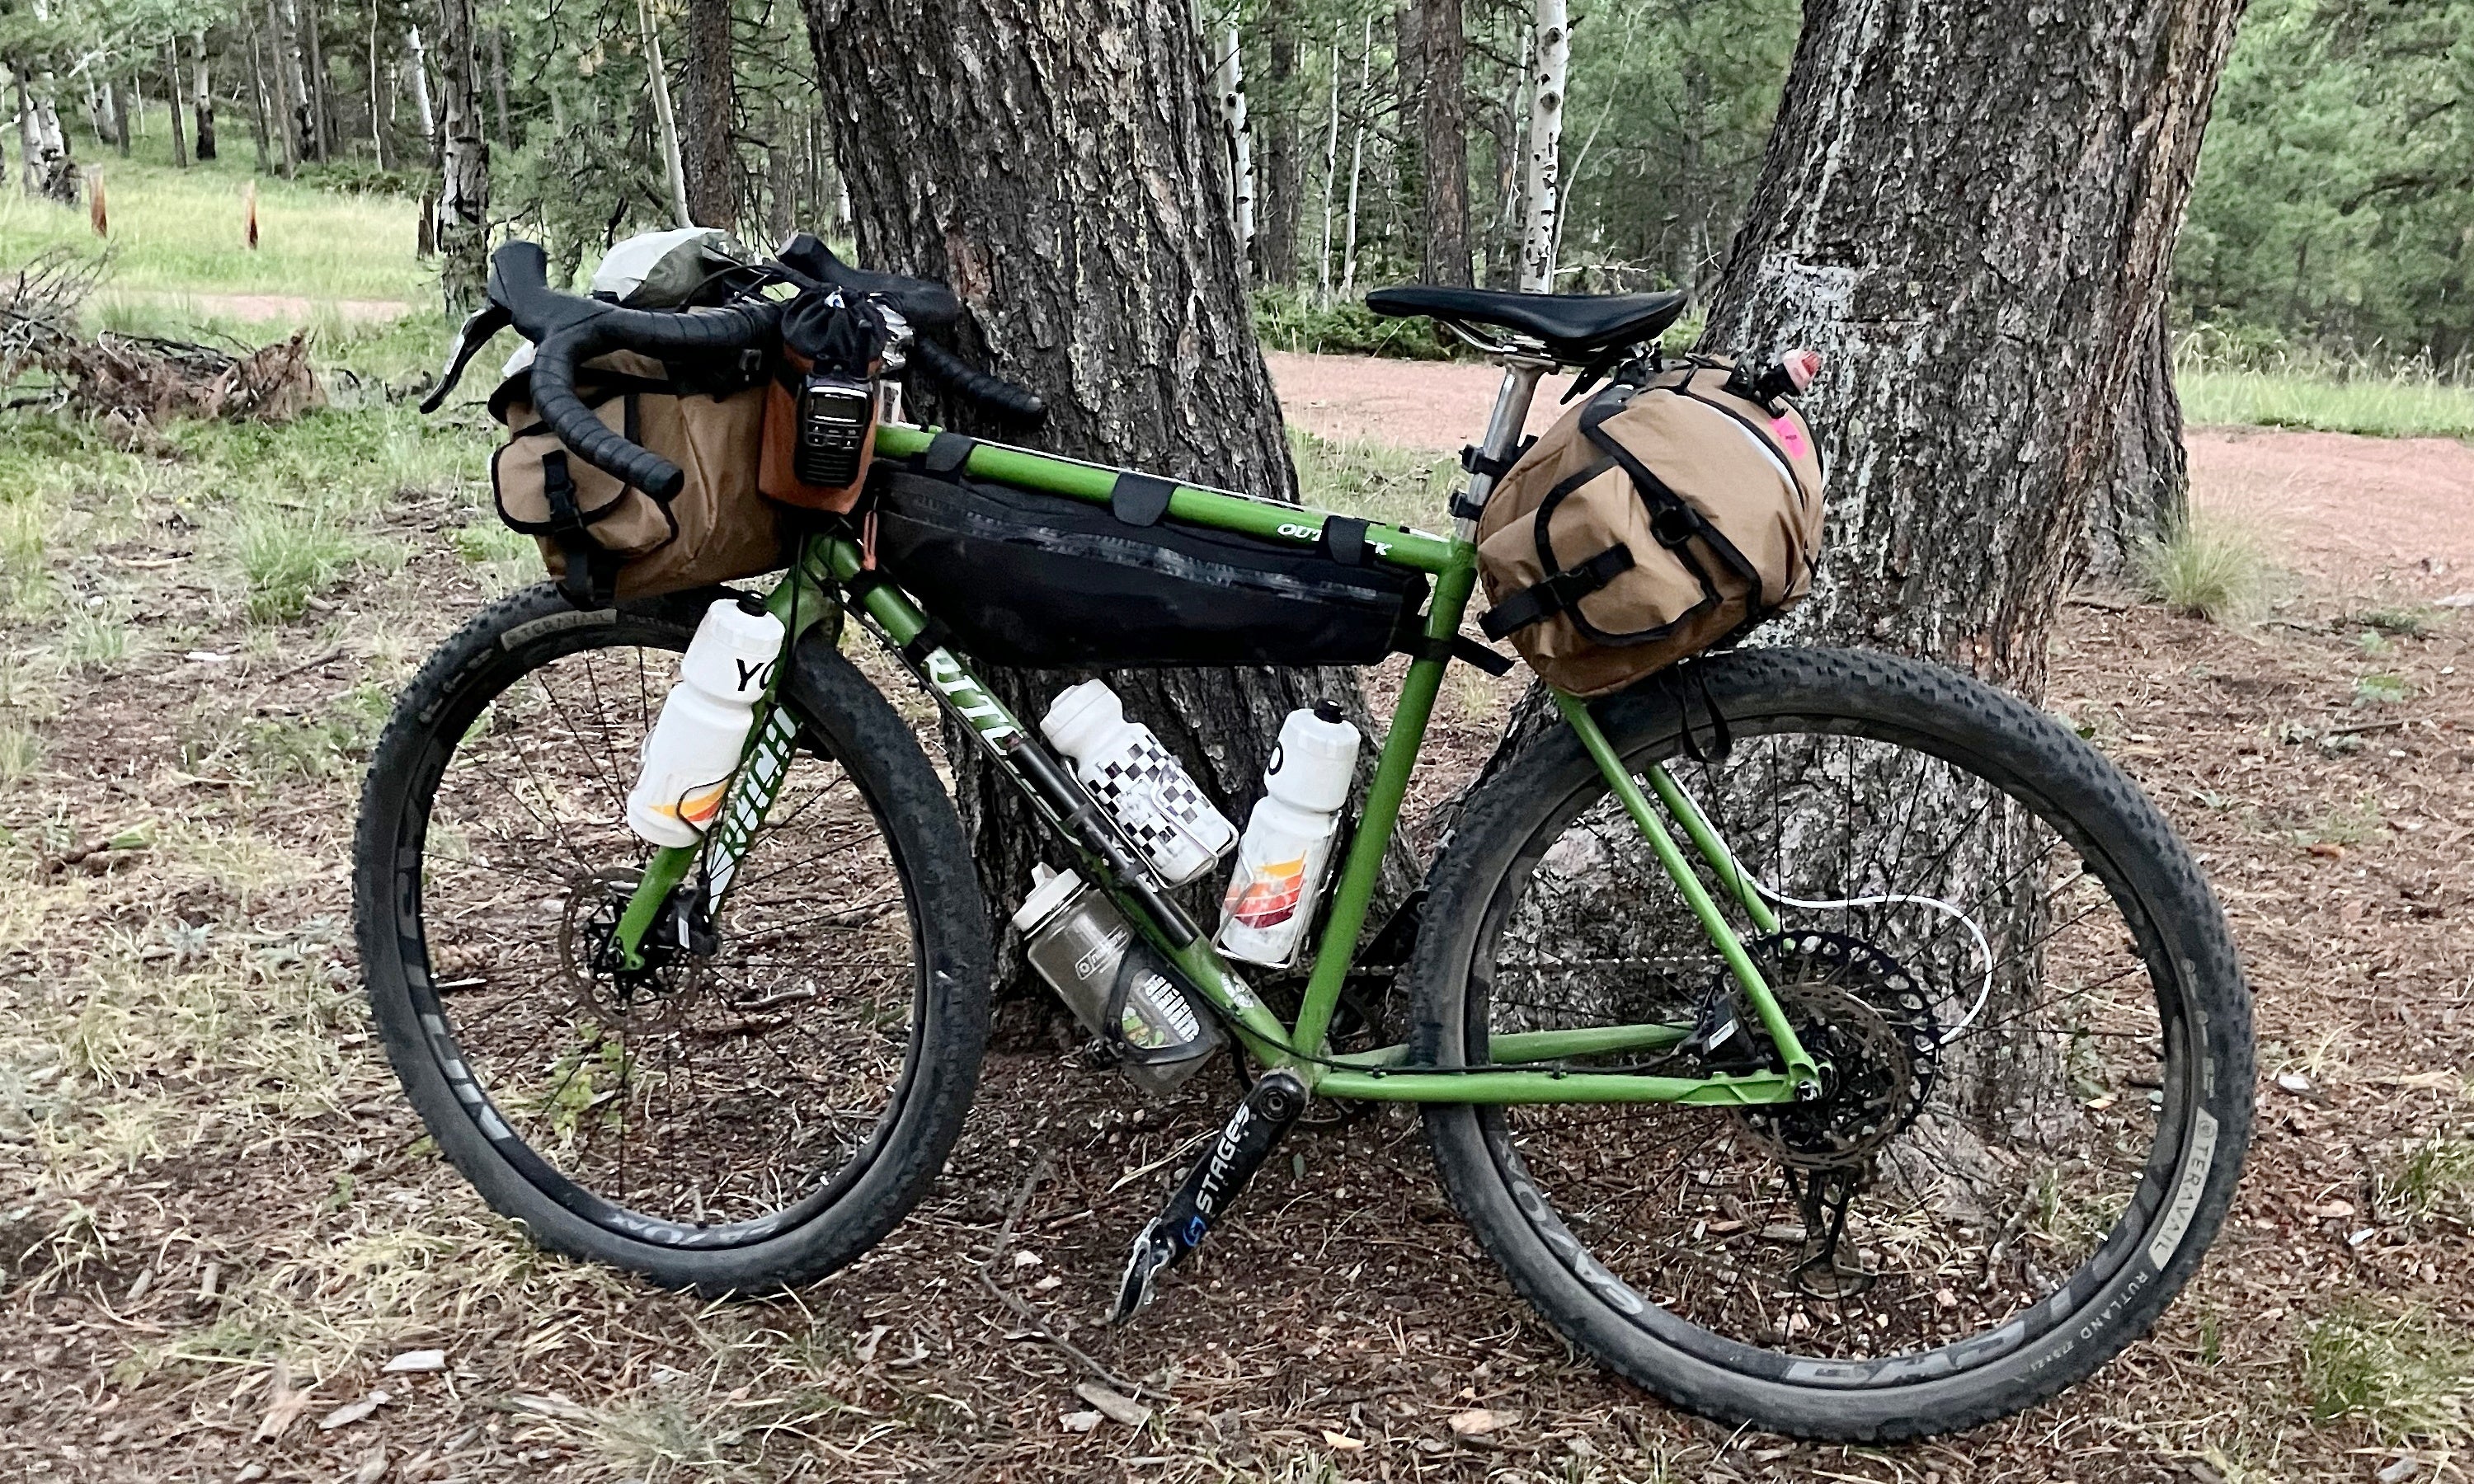
Testing my new Dynamo light.
My savior has been a weekly 30-50 mile group ride in my area which starts at 7:30 PM. This ride is great as it allows a bunch of people with busy schedules to get in some city/suburban miles with less traffic and way more visibility, but it does mean I have to stay on top of charging my lights (and my backup light for when my cheap rechargeable front light inevitably dies in the final miles).
So while I was content with my imperfect setup of rechargeable lights, I began keeping an eye out for some way to convert my Velo Orange Pass Hunter to a Dynamo lighting setup. Luckily, TPC buys and sells all sorts of bikes, wheels, and frames, so I knew it would only be a matter of time before the right thing would hit the website…
The Wheelset: MASON x HUNT 650B Adventure Dynamo

It is, of course, possible to buy a dynamo hub on its own and have it built into the rim of your choice. For many people, that may be the way to go as long as you know how to build a wheel (I don’t) or are willing to pay your local shop to lace it to the rim (I was on a bit of a budget).
The third option is to buy a rim with a Dynamo already laced to it. To my knowledge, only a few companies currently offer this. Crust bikes sells reasonably priced wheels with Shutter Precision PL-7 Dynamo hubs installed, but as a small operation, there is often a wait for your desired color and freehub variant to come back in stock. Hunt offers three rims laced to SON Dynamo hubs. Conveniently, a pre-owned MASON x HUNT 650B Adventure Dynamo wheelset hit the TPC site so I decided to pull the trigger.

MASON x HUNT 650B Adventure Dynamo Aluminum Tubeless Wheelset
$499.99
The Lights: Exposure Lights Revo Dynamo Front Hub/Light Set

The next thing I needed to source was a light. Luckily, we had a few sets of an old QR front Shutter Precision hub with an Exposure Revo Dynamo Front light (we still have 5 in stock as I’m writing this piece).

Exposure Lights Revo Dynamo Front Hub/Light Set 100mm QR 32 Hole Rim Brake Black
$72.99
Unlike some Dynamo lights, which use a cut-off beam to focus the light down and away from the eyes of oncoming traffic, this light isn’t specifically designed to minimize the impact to oncoming traffic. That said, after reading a few reviews (this one from road.cc was particularly useful) I was confident that it wouldn’t be any more disturbing to other riders than regular rechargeable options.
Setup: Not Easy, but Not Too Hard

The wheels were pre-owned, but the only minor sign of wear were some small blemishes on the SRAM XDR freehub body. Even so, I had already ordered a replacement HG body since I was installing it on a bike with GRX.
The lights and extra Shutter Precision hub came in a nice case. I removed the lights, wires, and connectors to prepare for installation, and left the SP hub in the case (I’m keeping it in the parts bin for a future project).

Feeling confident, I set up the tires, installed my cassette and threw the wheels on the bike. I mounted the light to the stub on my front rack and wound the cable down to the drive side of the hub, where I realized I had two separate connection standards. While I had two exposed wires, I had the adaptor from the kit which was designed to fit specifically onto the SP hubs.
After a bit of googling and some help from Peter White Cycles, I learned that the SON28 Hub on the wheelset features two male spade connectors which connect to female 4.8mm spade connectors. Luckily, I had two cables with exposed wires, so all I needed was a cable crimper, two female spade connectors and some heat shrink tubing to get the system working.
My local hardware store had the cable crimper (I bought the cheapest one they had — not an elegant tool, but it got the job done), but they did not have the spade connectors. Rene Herse happens to sell everything else I needed in a convenient Connector Kit for SON Hubs for 5 dollars.

Photo: Rene Herse Cycles
I had to wait a week for it to arrive. When it did, I was finally ready to finish the project. I crimped the cables (I highly recommend using Peter White’s wiring instructions page as a guide) and used a hair dryer to apply the heat shrink tubing to weatherproof the female spade connectors. I plugged them in and finally, two weeks after receiving the wheels and light, I took the bike out for a test ride.
Was It Worth It?

My biggest worry about this whole project was that I would be able to feel the added resistance of the Dynamo Hub while riding. Most estimates say that the SON28 adds somewhere between 3-6 watts of drag while you’re riding. As a rider who usually maintains a modest FTP of around 210, that means it might be sucking around 4% of my watts if I’m cruising around in zone 2 at 150 watts.

No drag detected...
After a spin around the block, most of my worries were gone. When holding the hub in your hand and holding onto an endcap, the resistance feels distinct, but once you’re on a 20lb bike it feels completely natural. Whatever resistance is there, it’s not discernable to my legs. Both while pedaling and coasting I’m unable to notice a difference that would ruin my enjoyment of the ride.
My first ride after finishing the installation was a 75 mile loaded ride to a state park to camp overnight with friends. My bike weighed around 40lbs with all my clothes, food and bags, and I had no trouble at all riding a normal pace and keeping up with the others in my group. Overall, my bike feels just like it did before installing the dynamo. That’s a good thing!

Next, I took the bike out on a 30 mile night ride, and I couldn’t be happier with the performance of the lights. When using my old rechargeable lights, I always had to run them on low to save battery. On this ride, the Exposure Revo felt about as bright as my old light on its brightest setting, which gave me more confidence on the wooded sections of path and sighting potholes on the road. Mounting the light lower to the ground helped both to improve my vision of the ground ahead of me and alleviate any potential issues of blinding oncoming riders. And the drag? Yeah, I can't even notice it.
All in all, the project cost me $667.97.
- MASON x HUNT 650B Adventure Dynamo Aluminum Tubeless Wheelset - $499.99
- Exposure Lights Revo Dynamo Front Hub/Light Set 100mm QR 32 Hole - $148.99
- Terminal and Crimping Tool - $13.99
- Connector Kit for SON Hubs - $5.00
If you’re interested in digging into a dynamo lighting setup for your own bike, I recommend starting with Bikepacking.com’s fantastic article “The Real-World Guide to Dynamo Hubs, Lighting, and Charging” which gives a comprehensive overview of the available options and the considerations to take into account when picking your hub and light. Local shops which specialize in the commuting/adventure side of cycling are often experts in Dynamo lighting and will likely be thrilled to help you source the required bits and help with the installation if you’d like to skip a bit of the tinkering.
That said, I managed to get it done on my own, and I’m no master mechanic. For me, this little project has been worth it just for the enjoyment of learning more about Dynamo lighting. I’m sure it will continue to pay off every time I can get on my bike at dusk. I just have one less thing to worry about charging!